Using everything that I learnt from making Mat's model earlier in the project, I created my own model that I'll be using for my animation. At the start of this task, I was pretty excited about creating my own design and I was really motivated to get started. And I made good head way in the beginning after starting the model off wrong and having to start over again (I think I got a little ahead of myself).

I had an easy ride all the way up until the hooves, which I struggled with at first because I couldn't get the bottom of the foot to cave in on itself to create the dip. To solve this I had to cut the bottom of the hoof in half to create an extra vertex and a central line through the foot. I also struggled with the arm, however, I was unsure of what had gone wrong, as the geometry kept becoming misshapen when I bounced between smooth and original mode. At the time, because I didn't know how to solve it, I decided to leave it and see if I could work with it. However, I did come back to it and re-do the arm in the end because it made it difficult to cup up the UV map. I realised that in my first attempt I had created too much geometry and it was this that was causing the geometry to mess up every time I tried to do something with it.
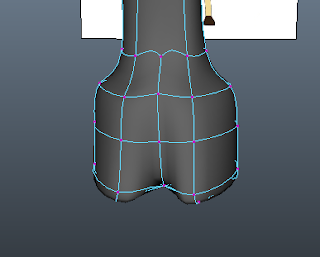 |
| Example of hoof |
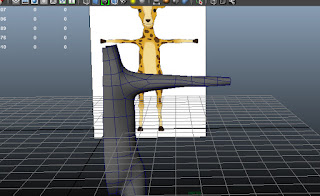 |
| Original Arm |
 |
| Corrected Geometry |
I also had a similar problem with the head, which Mat helped me out with, pointing out that I was attempting to use too much geometry, which is what prompted me to have another look at my arm. In terms of mistakes that was all I made when completing the mesh and I was really pleased with myself that I had managed to transfer what I had learned from Mat's tutorials into my own work with only a few problems that were easily solved.
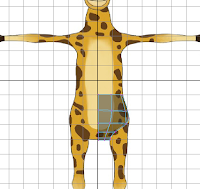
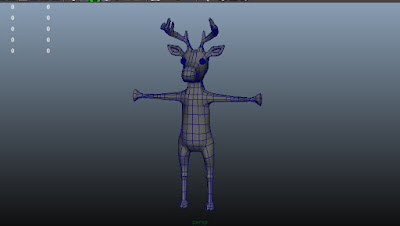 |
| Completed Mesh |
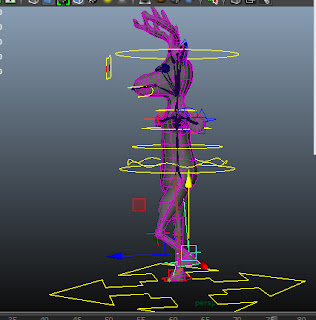
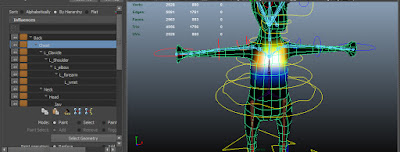
Feeling quite confident in my work I moved on to the skeleton and controls, which I found to be the easiest of all the tasks/ stages, as it was literally just places things in the right place. At this point, I was working efficiently and I had made good head way in a short period of time. However, I was also losing motivation, as I knew that it was going to get difficult and that some of the tasks were going to be tedious, which was putting me off doing my work, as I had already sat through it and done it once already, so my work ethic slipped at this point for the next few stages and it took me a lot longer than it should have to complete. Reflecting upon this, I could have done a lot more to motivate myself, such as taken more breaks and broke up my work load by doing other work in between, but I didn't. In future, I will push myself to be more work efficient, as it hasn't benefited me in any way slacking off.
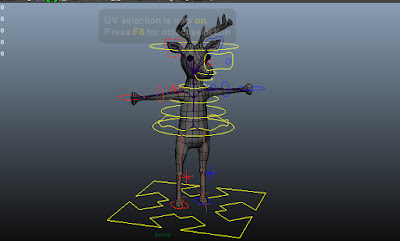 |
| Skeleton and Controls |
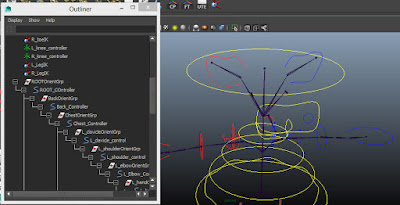 |
| Control Hierarchy |
 |
| Binding |
After this dip in motivation, I pushed myself to complete the model in time, however, I enjoyed it less, as I had a lot to do and I didn't want to do it. I also had some trouble with creating the control hierarchy but that was simply due to me not paying enough attention. I managed to complete the model with little trouble until I reached the weight painting. This stage I disliked a lot because it took me ages to get it right, as I was struggling to understand how the joints effected the mesh at first. But once I got the hang of it I found it a little easier but no less frustrating. All that was left was to unwrap the UV map so I could start animating.
 |
| Weight Painting |
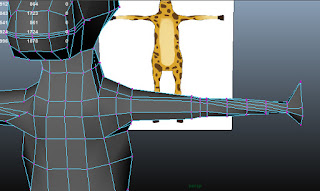
However, this seemed to cause a lot of problems and put me quite far behind because I couldn't find a solution. Once I had unwrapped the UV map, I started to encounter a problem with moving my model, each time I tried to do so it would select all of the UVs instead and move them around, displacing my UV map. At this stage I was already annoyed that I had spent so much time on the model and that I was behind, so I sought out Mat's help. He suggested that I attempt to re-bind the mesh to the skeleton and then add the weight paints back on to the model, so I did. After saving the weights and deleting the models history and re-binding the mesh to the skeleton, I re-placed the weights (and with a bit of re-adjusting of the weights) the model was all set. However, the same problem occurred again, so I went back to an earlier save file and attempted to UV map it again, but the problem occurred again. Because this problem is causing me to fall behind quite far, I have decided to UV map the model but not unwrap it until I have fully animated it, this way I can animate the character and possibly texture it after all the movement. This way, if I have the same problem in the end, it shouldn't matter too much, as I won't be manipulating the model at all., as it would have already been done.
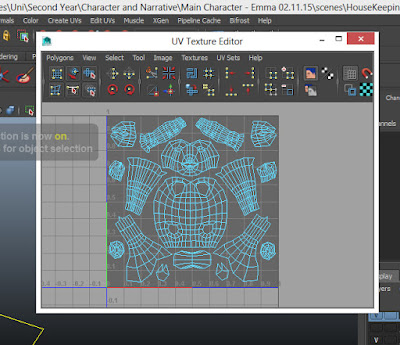 |
| First Attempt at UV Mapping |
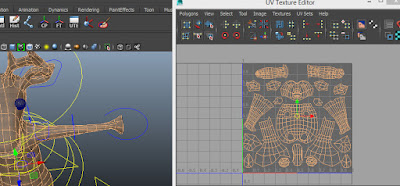 |
Second Attempt at UV Mapping
|
I am now ready to start animating, however, I feel as though I'm not as enthusiastic about this project as I was at the beginning. I do enjoy creating things in Maya and I have enjoyed learning how to create 3D models so far, but I have also found it incredibly frustrating and tedious in parts.


