Saturday, 9 January 2016

Applied Animation: The Environment - Initial Ideas

After the briefing Katy and I sat down and began to write down the first ideas that came to mind when we thought of the environment and we focused our ideas around animals, as this was something that I expressed an interest in doing during the group session. One idea that stood out to me straight away was the idea of expressing the issue of humans playing god in terms of re-introducing animals into the environment that are either rare, endangered or completely gone from the UK. I also liked the idea of having a contrast and touching upon the issue of humans playing god in terms of removing animals that they found to be a nuisance. With these two main issues being at the forefront of our attention we began to wonder how we could use these to create a documentary, this required us to think about what we wanted our message to be and what exactly did we want to research and convey through our work.

I'd recently watched a country file episode in which they were reporting on the re-introduction of wild boar to the English countryside and I thought that it linked directly to our line of thinking so we explored this to start with and developed ideas from there. Katy and I began to think of other similar instances and conflicting instances and came up with a few other ideas including seal slaughtering in Ireland; re-introduction of mink to solve the weasel problem; red kites being poisoned for killing farmers animals, etc.

Initial Brainstorms

We also began to think about which animals would be affected by such environmental changes and decided to create a small list of animals to focus on for our project. This focus on animals got us thinking instantly about creature comforts and we decided that we wanted to take a similar approach with our work in the sense that we wanted our documentary to be an interview with the different animals with the script being made of the facts and information gathered from our research.

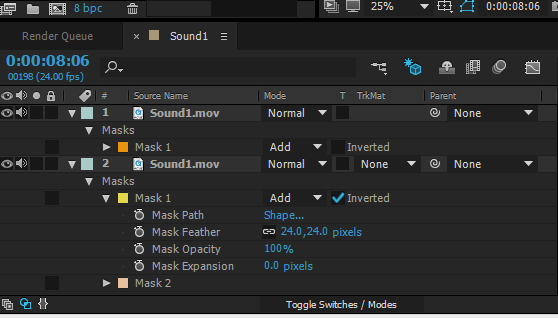
 Naturally we then started to think about what form of technique we wanted to use. Within the session we spoke about using mixed media in our animation, as this is a method that is used quite frequently in animated documentary and it is something that I really want to try, as I really liked the effect it had in some of the examples we went through. Keeping this in mind, Katy and I decided that we wanted to stick to 2D, as this is the technique that we both want to focus on rather than 3D, we also wanted to experiment more with traditional media, for me it was more because I felt that I have neglected the use of traditional media over the last few months and I'd really like to return to it, as I love hand drawn things and actually having to use materials such as paint and pencil to create work, as I feel that you can achieve so much in terms of texture, line work, etc that you can't necessarily create through digital means. However, we also wanted to keep the work load manageable, so we have decided that we will keep the animation basic and use digital outlines that are simple and easy to duplicate and focus on create intricate backgrounds with traditional media. We are also thinking of experimenting with texturing and rendering the animated characters with water-colours through the use of masks and compositing, which is something we will also have to research.

Media considerations

From here we spoke to Sara about our story and she pointed out that whilst we have a good base idea, we need to figure out what we are actually trying to say through our work, as at the moment it is a little hazy and all the over place. We were glad for the input and will sit down and finalise our ideas after we have dome some research into our issue. Overall, I'm really pleased to be working with Katy and I'm excited to see what work we will produce together and how this project will develop.

Thursday, 7 January 2016

Applied Animation: Round 2

At the start of this week we were given a briefing for applied animation, which I'm really looking forward to. For this module we are looking at animated documentary and even though this isn't something I am particularly interested in, as I am more for the narrative side of animation, I'm really looking forward to the opportunity to experiment with something that I want to explore as my specialism.

As part of the task we were given four themes to choose from; the environment, family, sports, mental health and I decided to go with the environment, as I felt that this would give me a lot of freedom in terms of subject matters and idea generation. I also wanted to go with this theme because I feel quite strongly about the environment and I was glad that I had the option to explore something that I have an interest in. As part of this project we are required to work in groups and after thinking about it carefully I decided that I'd really like to work with Katy Mulvey because I personally felt that we possessed skills that would benefit the other. Katy leans more towards pre-production and production, whereas I lean more towards production and post-production. Not only this, but we have a very similar workflow and mind set towards work and I feel that we will make a good team. I am also looking forward to working collaboratively again, as I'd really like to improve my team working skills.

Overall, I'm really excited to get this project started and I'm looking forward to working with Katy and improving upon my existing skills and learning new ones.

Tuesday, 5 January 2016

Responsive: Do It In Ten - Chilly

For my first brief I decided to do Show me the Animation's Do It In Ten challenge. The brief consisted of creating a 10 second animation that followed the theme of the word they had chosen for that month (December's being chilly). This animation could be created however you wanted it to be and could be of anything regarding that it stayed within the theme and didn't contain any inappropriate themes, as this site it available to children.


I liked the sound of this brief, as I felt that it would give me the opportunity to create something a little silly and to just create something for the sake of animating. I really wanted a relaxed brief to help me get back into the swing of animating and I also didn't want anything too serious, as I don't really like focusing on serious topics. I saw this as an opportunity to practice my digital animation and to work on creating more simplistic styled characters, as I have found that my drawing style has been too realistic in the past and I haven't liked my work as much due to the fact that my style has been quite difficult to animate. 

Thinking about the theme chilly I instantly thought of polar bears and decided to create my idea based around a polar bear. My thought process was quite simple and I decided to do a polar trying to catch fish simply because I was eating fish at the time I was thinking of an idea and due to me not having very long to complete the brief (7 days) I went with the first idea I came up with. 

Storyboard

I completed this brief over the Christmas break and I must admit that I planned my time very poorly, which led to me rushing this animation and ultimately to me being a little unhappy with the outcome and a few technical hitches. Despite this however, I feel that I have managed to successfully complete the brief and fulfill all of the criteria they were looking for. Due to my poor time management, I didn't actually do any character design, but more just went with what I drew because I was short on time and didn't feel that I would have been able to complete the task before the deadline if I had spent time on designing a character. Despite this however, I am extremely happy with my character and I feel it fits in very well with the overall animation. In terms of actually animating however, I do feel that more care could have been taken with attempting to keep the volume steady throughout, as there are a lot of frames in which the characters increase and decrease in size. Although it doesn't look too bad, I am still very unhappy with it, as I feel that if I had given myself more time, I would have been able to take more care with making sure this didn't occur so often or as much. 

Another issue I had with this brief was the site was temporarily down when I tried to submit my work. This made me very frustrated at the time and flustered, as I thought I was going to miss the deadline, however, it was a fault on their end, which they resolved and my entry finally got accepted. But I did end up accidentally sending the wrong animation so my entry unfortunately has no sound, although I feel that this isn't a major set back and it is something that I can deal with. 


Overall, I am quite pleased with how I managed to deal with this project despite the fact that I was terribly unorganized and didn't focus on this brief as much as I should have. This brief has also made me think of how I tackle other briefs for this module and in general and it has given me a huge insight into how much time each brief will take roughly. It has also made me see that I will have to plan my time out efficiently and I intend to do so in order to avoid the same problems I encountered with this brief. 


Responsive: Made You Look

'Made you look' is a documentary that follows the views and opinions of of those that work in the creative field; particularly those who work in graphic design, illustration and animation. The film looks at both traditional and digital media and gives an insight into what it's like working in the creative industry. I found the film quite interesting and I feel that I gained a lot of insight into how the industry works for individuals involved in similar areas of work that I am studying and it also encouraged me to continue working with traditional media, as it isn't something that is particularly dying out within the industry and being an animator, it is definitely something I can incorporate into my digital work.

I found it really interesting to hear the opinions the artists had of traditional and digital media, as I found them to be quite biased towards their own method (traditional artists didn't like digital and vice versa) and I personally found it quite difficult to get my head around in terms of the artists not mixing the two together, as personally that is something I like to do and wish to explore more. However, the viewpoint within the film seemed to be that although some people were against this 'digital takeover' others thought that the digital methods adopted the traditional method more than we thought, as the graphics tablets that are used require an interactive pen to work, and you create work on them in as much the same way as you do with traditional methods.

The film has encouraged me to explore traditional media more and not be afraid of trying new things out. Overall, I found it really useful and I enjoyed being able to hear the views of successful practitioners within practices similar to my own.                                            

Responsive: Breaking Down a Brief

Before Christmas we had our first responsive session in which we were gathered together with the illustration students. This instantly put me out of my comfort zone, but I was glad for the opportunity to meet some of the illustration students, as I will have to collaborate with some of them in the second half of the responsive brief.

Within the session we were given a few briefs to look at to help us learn to analyse and read a brief correctly to help us with our own briefs we'll be looking at over the next few months. Alongside this we went through a few 'top tips' to consider when looking at a brief. These included things such as setting clear aims and realistic objectives, being smart when choosing a brief and not choosing a brief to fulfill the module, but choosing a brief because you agree with the briefs goals or because you will enjoy the brief.

We were also encouraged to think about what audience the briefs were trying to address, as this would lead the tone, mood and style of the outcome. Overall, I found this session really useful, although I'm not 100% sure that I will enjoy this brief simply because I lack confidence in my own work. Having said this, it will give me the chance to build on my confidence.

Character and Narrative: Reflection

I have found this module to be extremely challenging yet satisfying. Not only has it challenged me as an animator, but it has also given me the opportunity to challenge myself as an individual and work on my skills as a team member. Not only this, but this module has also pushed me very far out of my comfort zone, which is something I struggle to do, and it has given me an insight into how well I can deal with learning and creating things with software and skills I am not very confident with. I also feel that I have gained a number of skills that I will be able to carry over into future modules and beyond university.
Reflecting upon the tasks that I had to complete for this module, I feel that I have made great progress with Maya. I have learnt how to effectively use Maya to create a working 3D model, as well as how to animate that model to a good standard. I have also developed a new range of skills in 3D animation that I can potentially use within 2D animation as well. For instance, I have learnt a lot more about key framing and the importance of it as a way to plan out an action. I’ve found that I have a much better understanding of how certain movements should be planned out, such as walking, and I feel that I will be able to adapt this to 2D animation. Not only that, but I have improved as an animator in general, my animation is cleaner and smoother than previous work.
In terms of team work I feel that this is an area I am going to have work on quite a bit, however, I feel that I did ok for my first attempt. Whilst I made a lot of effort to stay in constant communication with my partner, when they were unresponsive and uncooperative, I let it discourage me from trying to talk about work, which meant that I was unaware of what they were doing and the progress they were making. I also made little effort to speak to my partner after long periods of my partner not talking to me, as I felt that they weren’t interested in what I was doing and the progress I made. Another thing I need to work on is my communication of progress and ideas, as my partner and I struggled with certain areas of the project due to things being unclear. To do this, I am going to look at how I can improve the clarity of my ideas and thinking by writing it out first and then talking about it. Although this part of the module has pointed out that I’m not great at team work, I am really glad that I have had this opportunity to work collaboratively and it is definitely something that I am going to continue to do at every opportunity I get.
Although I feel that this module has gone really well in terms of self improvement and learning new skills, I have also encountered a number of technical difficulties that I haven’t necessarily learnt from. Whilst working with Maya, I encountered a number of problems that I wasn’t aware of nor did I have any understanding of how to fix the problems, as each time I encountered a problem, the fix was slightly different. I found the software extremely confusing and I lacked a lot of confidence when I came to use it because I found it very overwhelming. Despite this, I have managed to create an animation that I am proud of and I have come away with an understanding of how to model, rig and animate a character in Maya.
However, I feel that I did well with problem solving overall throughout the module, as I managed to produce solutions for problems that contributed to the quality of my animation.
Reflecting upon my time management, I feel that this has been my most managed project out of all the projects I have done. Not only did I have my sections of the animation done on time, but I also had a week left to make minor adjustments. I also feel that I managed to keep on track with my partner fairly well and I was never too far behind or ahead of them. This is something that I am really pleased with, as time management has always been an area in which I am either really good or really bad, but I feel that I have managed to keep it nicely balanced this project and I will work on keeping this steady balance throughout my future projects, as it has helped to keep my stress levels down.
However, motivation has been a big issue for me throughout this module. I feel that I was getting frustrated a lot throughout this module because I was working with a complex program that I didn’t fully understand. I also found that my interest in 3D animation quickly dissolved once I actually started to work with it, which made me lose interest in actually doing the work. In order to get over this, I balanced my work between this project and small self-directed projects to help boost my motivation and get the work done.

Overall, I have enjoyed completing this module and the opportunities it has provided for me. I have also enjoyed overcoming the problems I have encountered, as I feel that it has helped me to develop as an animator and an individual. Not only have I improved as an animator, but working with a program I am not at all confident with and producing a piece of work I am happy with has boosted my confidence in my own work and in myself. Having said this however, I don’t feel that 3D animation is the right form of animation for me and I don’t think it will be something I explore in this level of detail again. 

Tuesday, 8 December 2015

Limitation: The Use of CGI

CGI is something that has been used for many years now within live action film to help tell stories that would otherwise be impossible without the help of CG animation. Animation has been used before in live action film to help tell a more compelling story, such as Who Framed Roger Rabbit. However, the use of CG animation has become a thing that is being used in almost every film that we watch, making it grossly overused. With the advancement of computers and CG animation the limitations of what can be done with CG animation are becoming less compared to what can actually be achieved, and whilst this is a good thing, it also means that films such as Interstellar, which use full scale sets and props, are becoming less popular among directors and producers.


This is more than likely because it has become a lot cheaper to create CG animation than it is to create full sized props. However, with technology advancing so quickly, today's special effects and CG animation will quickly become outdated, meaning that the learning curve for creating such effects is a very steep one making CG animation both an effective tool as well as a very difficult tool in terms of keeping it up to date.

Character and Narrative: Finished Model

Although my model isn't perfect, I feel that I have managed to make a good effort in creating my first 3D character and I feel that I have learnt a lot in a small amount of time. Although it was difficult and I found it highly frustrating, I have enjoyed the overall learning curve.


Character and Narrative: Character Rigging

When I came to open up my most recent Maya project, I found (to my own frustration) that my skeleton scene hadn't saved at all. Anywhere. So before moving on I had to re-do the skeleton of my model. Although I'm annoyed that it didn't save, it has made me think about where I'm saving my work and I have backed up everything I have to date to avoid this situation again and I'm grateful it was only a small, simple part of the process that I lost.

Moving on...

The next part of the rigging process was pretty straight forward and I had no problems with it whatsoever, in fact it was a nice change from some of the more complex stuff that we've been doing recently. It was smooth sailing all the way up to until I had to orient the controllers, in particular the hand controller. I was really struggling with getting the hand controller to orient to the local transformers of the joint. This was because I was trying to orient the null group to the hand controller first, instead of orienting it to the joint. It was a simple mistake that was difficult to spot at first, so I struggled with this for a while, but I learnt my lesson and didn't make the same mistake again and was able to orient the rest of the controllers with no problem.

Shaping and Placing Controls

IK Handles
Orienting Joints

The next few stages went quite well, I didn't run into any problems and I picked up what I was supposed to be doing fairly quickly, as the tasks were quite repetitive and it wasn't until I reached the weight painting that I found the task a little confusing, as parts of the model were becoming influenced by other parts after I had altered them. However, this was due to the program wanting all parts of the model to be influenced and once I had made sure that each part of the mesh was influenced by a joint, I no longer encountered this problem.

Connecting Controllers
Binding
SDK
Reverse Foot Setup
Reverse Foot Setup

I did struggle with the reverse foot set up, however I was also very tired and I became impatient and made many little mistakes that were my own fault. I was also having technical difficulties at the time and kept forgetting to save. Other than making silly little mistakes I feel I did relatively well for my first time making a 3D model, even if I have garbage values in a lot of my controllers (oops). 

Garbage Values
On top of this, everything works fine except the eyebrows don't scale like the rest of the body, and I haven't been able to fix it no matter what I do, nor do I have time to go back and seek Mat's help. I could've taken a lot more care and time on this model if I had wanted to, however I was becoming frustrated with the whole process of rigging the character and so I struggled to stay motivated and to pay attention to what I was supposed to do.

Monday, 7 December 2015

Telling Tales: Complete Animation

It's finally done! I'm really happy with the overall outcome of the animation and although there are a few small adjustments that could be made (they are slightly picky) the overall finished animation is a nice quality and is clear. I feel that we have both made a really good effort with this animation and I am particularly pleased considering I wasn't all that confident or enthusiastic about using Maya.


Although I have overcome every problem I have encountered throughout this module, I feel that I am more interested and suited to 2D animation, as I enjoy that more. I'm also not a huge fan of working in pairs, however, that may be down to who I was partnered with and I will definitely be doing small projects with other peers in order to build on my collaborative skills and get used to working with a partner or partners, as this is something I will have to do in the industry. Overall, it has been a huge learning curve for me, and although parts of it have frustrated me, they have also challenged me and I feel that I have learnt a great deal from the module, not just skills related to Maya either, but skills that I can adapt to all forms of animation. 

Sunday, 6 December 2015

Limitation: Production Time

With 3D animation, the pre-production stage isn't as straight forward as it is for 2D animation. Unlike 3D animation, within 2D animation once the character design, story-boarding and animatic are complete, animating can usually begin. However, in 3D animation, before animating can begin, all of the characters that are involved in the animation need to be made, rigged and textured, which takes considerably longer than 2D production and if there is a lot of detail, there could be a considerable amount of time to wait before production can actually begin. Not only this, but the skills needed to create these character will be done by people who have trained for years in order to hone their skills, as they are a very specialised skill set and because they have such a specialist skill, they may be more expensive to hire than other animators in the 2D field.

Limitation: Computer Power

A limitation of 3D animation is that it takes a lot of computing power to perform many of the tasks and processes. Not only is it expensive for the computers that can handle the demand of 3D software, but it also, more often than not, necessary for a large number of these computers to be used for render farms. Render farms are a collection of computers that are set up simply to render out 3D footage and they are used, particularly for feature films, to reduce the render time of the footage. These computers will have high end components to help them run and perform tasks quickly and efficiently.
However, they can't be used for anything else, as they are soley used to render footage, which for the price they come at, makes them a very expensive necessity that smaller companies and studios may not be able to afford or may not have access to, whereas 2D animation can be created on much cheaper computers. Not only this, but the actual software is also extremely expensive, and although software such as Maya is available to students for free for 3 years, that license can't be used for commercial use, and there aren't any deals out there for independent animators or smaller studios. The expense of 3D animation may turn animators and studios to other methods of animation that are a lot cheaper and accessible, turning 3D animation into a medium used only by larger companies such as Pixar and Dreamworks.

Potential: Environments

Although there may be many disadvantages and limitations to 3D modelling and CGI, I wanted to focus on one of its potentials; environments. I think it's pretty safe to say that they have got it right when it comes to creating 3D environments which have the ability to take us into that world and leave us speechless and awed, as prime example being the environment of Avatar.

Screen shot from Avatar

Screen shot of Avatar

The level of detail within 3D environments could be argued to be greater than the level of detail that is placed into 2D animation. This could be put down to the fact that 3D environments don't have to be re-drawn for different camera angles, as once the scene is made, the animator isn't limited to the perspective the scene was created in, unlike in 2D animation. This opens up a whole new way of working for animators, as they don't have to think too much about what they can and can't do within the scene, allowing them to be more creative with their camera angles and character movement, which could be achieved with 2D however it would be a very laborious and expensive task.

Telling Tales: Adding Sound

Once I had finished all of my post production, I handed it over to Lauren to add the final sounds, which we had decided on quite early in the project. Although out communication was strong throughout most of this project, Lauren did take charge on this section of post and I feel like I didn't have much of a say in the sound design, as she didn't show me any sounds after the start of the project. Despite this however, I agreed with her choice of soundtrack and I feel that it works really well with the whole theme of the animation and the pace of the animation. 

Lauren's added sound clip

After she had added the soundtrack to the animation, Lauren came to me asking if I wanted to add sound effects over the top (such as the adult sighing in frustrating). After listening to it however, I felt that other sound effects were unnecessary and Lauren agreed. However, just to make sure, we had a few of our peers listen to and watch the animation to see what they thought. They all agreed that the soundtrack was enough, so we made the final decision to leave out any sound effects and have just the soundtrack. Overall, I feel that animation works really well, the only issue is the floating character at the start, which I have fixed. 

Telling Tales: Floating Fix

After getting everything finished last week, I had a look at attempting to fix the floating issue in After Effects with masks. The idea was that I'd be able to get rid of the shadow under the character's feet in order to make it look grounded.

Adding masks to the layers

The process was pretty straight forward and easy to do, however it didn't have the desired effects, as the floor plane in the footage faded out to different shades of white, making it difficult to achieve the same effect. If I had stuck to it, I'm sure that I could have created masks that had the desired effect that we wanted, however, this seemed to be a lot of work for something so simple.

Effect of rough mask

After speaking to Lauren and telling her what I could do with the masks, I decided to also mention that it would most probably take less time to re-render that scene and adjust the eyes I had created in post. Because I had time to do this, I did end up re-rendering the first scene. However, when I came to open up the After Effects project, the save I had created wasn't anywhere to be found, so I had to key frame a few more than I expected. But, due to good time management, this didn't set me back or bite into any of my project time or create any consequence to the quality of our work.

Key Framing

Overall, I'm really pleased that I decided to go back and fix the floating character, as it makes the whole animation look cleaner and more professional.


Thursday, 3 December 2015

Telling Tales: Post Fix and Fully Rendered Scenes

After animating and rendering all of my animated scenes I then had the lovely task of placing the pupils onto my character in After Effects. This was pretty straight forward, as all I had to do was create the shapes and key frame them. Although it was easy, it did take the best part of a day to complete, however, I am in a really good position, so I wasn't feeling any pressure to rush this.

Example of eyes before keying them

I feel that I managed to do a good job at placing in the pupils, I don't think that they are out of place and I feel that they work well with the aesthetic.

Compilation of my rendered scenes

Once this was done I was ready to render out all of my frames fully, however I did come across a small problem when I finished rendering and that is that my character wasn't actually on the floor in the first two scenes I had rendered. With the time that I have left, I felt comfortable enough adjust my character in Maya and re-render the scenes. After doing this and replacing the footage in After Effects, I realised that my changes hadn't actually stuck and that my character was in the exact same position as before. With this taking up a bit of time, I have decided to leave it, as both Lauren and me want to move on to adding sound and generating our final piece. 

Wednesday, 2 December 2015

Telling Tales: Animating

For the last week I have been getting on with animating my character in Maya and I have to say that I have found this section of the project a lot easier and a lot less stressful than the other parts, simply because I have enjoyed animating and how easy it is to animate in Maya. Lauren and I had both decided to take 6 panels each of the storyboard and I was to animate all the panels with my character in them, however, this meant that Lauren would have more to animate so I took the last two panels of her character and was given 11 seconds of her character to animate too.

As I said I found animating in Maya very easy to do and I even found animating the camera easy to do too, so I was able to get all of the animation done in a week. This has left me with more time to work in post, as I will have to put in the pupils. The only section of the animating I found slightly difficult was Lauren's character, as I had to try and match the same style of animation. However, this was extremely difficult, as Lauren didn't actually provide me with any of her footage to watch, so instead I sat for over an hour watching YouTube videos of babies walking.


In the end this is the footage I decided to use as reference, as it had all the elements I needed for my reference. Without having Lauren's footage and no access to any of her footage, I had to go ahead and animate the character as I would have done if it were my own and hope for the best. I wasn't too happy about this, but I did my best. 

Throughout animating I conducted a render test to test all of the textures and to see how the character moved in the environment and I felt that they were all working well together so I continued to animate and work towards a finished piece. 

A compilation of all of my render tests

Overall, I am really pleased with my animation and I feel that I have managed to pull the project around and work really well towards an end piece. I am really pleased with how efficiently I was able to animate in Maya and how simple I found it. Hopefully post will go just as well.

Telling Tales: UV Fix

Although I was going to wait until I had animated my character, I managed to catch Mat in the morning and discuss what I should about my UV mapping problem. After explaining everything that had gone wrong he suggested that I attempt to unwrap my model 'old school' style and use the legacy unfold rather than the 3D unfold.

Using Legacy unfold

Although this took a very long time, it worked and meant that I could unwrap my UV map as well as animate my character without the all the fuss I was having before. I managed to do this with little trouble until I reaches the more complex parts of the body, such as the head and the horns, but I feel that I managed to bounce back and catch up with my partner in time to begin animating in the same week.

Complete UV Map 

This problem occurred because Maya 2015 has a problem with 3D unfold once the mesh has already been bound to the rig. In order to avoid this in the future, I will remember to UV map my model and unwrap it before I move on to binding everything, this way I will save a lot of time and hassle.

Once I had fixed this problem, I realised that my character didn't have pupils and when I came to put a ramp shader on them, my eyes, for some unknown reason, were back to front and I couldn't turn them around. At this point I was tired of building my model and just wanted to move on, so I decided that I'd fix this in post, as it is a simple enough fix. 

Telling Tales: Final Crit

During our final crit I showed the very small render testing I had done and asked my peers for feedback regarding the style of the animation and what they thought of my ideas for animating. I received some really positive feedback and people were in agreement with what I had to about my work. They liked the environment and thought that the character and story worked really well with what we had chosen.

In terms of animating they suggested that I pay attention to my character's poses, as my character is very stationary throughout the animation. This means that I am going to have to think about creating very strong poses and possibly subtle movements for my character in order to portray its emotions as clearly as possible. One idea I had, which I also experimented with a little in my render test, was to have the character's ears twitch as a sign of annoyance and anxiety. My peers agreed with this and thought that it was really good idea and a very subtle way to help portray the emotion of the character.

They also discussed with me my issue with the UV map and suggested that I try to fix that as soon as possible and look into other ways of getting around it, however hey weren't sure what other ways it could be approached. They also encouraged Lauren and I to start choosing our soundtrack and sound effects, so we get an idea of what the overall piece would be playing to. And obviously they told us just to get on with animating and try push through it as much as possible.

Overall, I am really happy with the feedback we received and it has given me a boost in confidence in my own work and I am feeling a little less down-hearted about the project.

Telling Tales: Animating and Render Testing

In order to have something to show for our final crit, I decided to do some simple animation and a render test to get a feel for what to expect when animating in Maya and to see how the background would look when rendered. 


Although it's not much, it gave me an idea of how the character would look in the environment and how easy and simple it is to animate in Maya. This has given me a huge boost in motivation, as I feel more confident now that I am animating. I am also really pleased with how the character looks within the environment, and I feel that it works really well and produces a nice clean finish. I am now officially ready to start animating (wooooo!). 

Sunday, 22 November 2015

Telling Tales: Character Modelling

Using everything that I learnt from making Mat's model earlier in the project, I created my own model that I'll be using for my animation. At the start of this task, I was pretty excited about creating my own design and I was really motivated to get started. And I made good head way in the beginning after starting the model off wrong and having to start over again (I think I got a little ahead of myself).


I had an easy ride all the way up until the hooves, which I struggled with at first because I couldn't get the bottom of the foot to cave in on itself to create the dip. To solve this I had to cut the bottom of the hoof in half to create an extra vertex and a central line through the foot. I also struggled with the arm, however, I was unsure of what had gone wrong, as the geometry kept becoming misshapen when I bounced between smooth and original mode. At the time, because I didn't know how to solve it, I decided to leave it and see if I could work with it. However, I did come back to it and re-do the arm in the end because it made it difficult to cup up the UV map. I realised that in my first attempt I had created too much geometry and it was this that was causing the geometry to mess up every time I tried to do something with it. 

Example of hoof
Original Arm
Corrected Geometry
I also had a similar problem with the head, which Mat helped me out with, pointing out that I was attempting to use too much geometry, which is what prompted me to have another look at my arm. In terms of mistakes that was all I made when completing the mesh and I was really pleased with myself that I had managed to transfer what I had learned from Mat's tutorials into my own work with only a few problems that were easily solved. 

Completed Mesh
Feeling quite confident in my work I moved on to the skeleton and controls, which I found to be the easiest of all the tasks/ stages, as it was literally just places things in the right place. At this point, I was working efficiently and I had made good head way in a short period of time. However, I was also losing motivation, as I knew that it was going to get difficult and that some of the tasks were going to be tedious, which was putting me off doing my work, as I had already sat through it and done it once already, so my work ethic slipped at this point for the next few stages and it took me a lot longer than it should have to complete. Reflecting upon this, I could have done a lot more to motivate myself, such as taken more breaks and broke up my work load by doing other work in between, but I didn't. In future, I will push myself to be more work efficient, as it hasn't benefited me in any way slacking off. 

Skeleton and Controls
Control Hierarchy
Binding

After this dip in motivation, I pushed myself to complete the model in time, however, I enjoyed it less, as I had a lot to do and I didn't want to do it. I also had some trouble with creating the control hierarchy but that was simply due to me not paying enough attention. I managed to complete the model with little trouble until I reached the weight painting. This stage I disliked a lot because it took me ages to get it right, as I was struggling to understand how the joints effected the mesh at first. But once I got the hang of it I found it a little easier but no less frustrating. All that was left was to unwrap the UV map so I could start animating.

Weight Painting

However, this seemed to cause a lot of problems and put me quite far behind because I couldn't find a solution. Once I had unwrapped the UV map, I started to encounter a problem with moving my model, each time I tried to do so it would select all of the UVs instead and move them around, displacing my UV map. At this stage I was already annoyed that I had spent so much time on the model and that I was behind, so I sought out Mat's help. He suggested that I attempt to re-bind the mesh to the skeleton and then add the weight paints back on to the model, so I did. After saving the weights and deleting the models history and re-binding the mesh to the skeleton, I re-placed the weights (and with a bit of re-adjusting of the weights) the model was all set. However, the same problem occurred again, so I went back to an earlier save file and attempted to UV map it again, but the problem occurred again. Because this problem is causing me to fall behind quite far, I have decided to UV map the model but not unwrap it until I have fully animated it, this way I can animate the character and possibly texture it after all the movement. This way, if I have the same problem in the end, it shouldn't matter too much, as I won't be manipulating the model at all., as it would have already been done.

First Attempt at UV Mapping

Second Attempt at UV Mapping
I am now ready to start animating, however, I feel as though I'm not as enthusiastic about this project as I was at the beginning. I do enjoy creating things in Maya and I have enjoyed learning how to create 3D models so far, but I have also found it incredibly frustrating and tedious in parts. 

Monday, 26 October 2015

Telling Tales: Interim Critique

In today's interim critique, Lauren and I pitched our ideas and narrative to the rest of the class in order to gain some constructive feedback about our characters, narrative and overall ideas. I feel that people had a positive reaction to our ideas and I am really pleased with the feedback we have received, as it is will be beneficial to the development and improvement of our narrative.

Slides from our presentation


The first thing that was discussed was our character design. People feel that our character designs work well together and that the styles match really well, which was a huge relief for me, as I really struggled with this element of the brief because I'm not a fan of character design, nor am I very good at it. Having said this, there are a few things that we need to consider looking at to help improve out characters. Personally, I need to look at possibly making the parent characters neck slightly longer to help distinguish between the two characters. Whereas Lauren need to look at altering the baby characters head and eye size to make them a little bigger. Comments were also made about the nappy, that maybe it isn't necessary to have the nappy, as the size and shape difference might be enough to make a clear distinction. Once we've experimented with these changes we both need to scale the characters to each other to get a feel for how they will look together once they have been made in Maya.

The discussion then moved on to our narrative and my uncertainty on how to end the story. After seeing the animatic, I asked whether the baby should fail to reach the parent and fall at the last second or if it should in fact reach its goal. I feel that the overall reaction reflected that a comical ending would be more favourable, and personally I feel that I'd much prefer to have a comical ending, as it would link in better with the story as a whole. However, this is something that I will have to discuss with Lauren before I start to make decisions and a final storyboard. It was also pointed out that we should try to portray a sense of exasperation within the parent at the baby falling over all the time, as it links in well with the narrative and adds a little humour to the story. Although we've already attempted to show this, maybe we could find some opportunity to show it a little more, however I feel that we will be fin with what we have if it is animated correctly.

Moving on to the environment, some of our peers felt that our 'Pocoyo' style setting was too simple and 'cold' and that it made the narrative less family oriented because it is all white. However, we don't feel this is the case and although adding colour tints to the walls and floor were suggested, we aren't going to do this, as we want to keep the environment as simple as possible. Another comment was made about adding colour through baby toys being scattered on the floor however, and I feel that this is something we could experiment with. It was also suggested that we add a rug to our environment to help establish a ground plane and I feel that this would be a good idea, as it would help to break up the room and help to focus the viewer's attention.

On a final note we discussed possible soundtracks and sounds that we wanted in our animation. People were happy with our selection and thought that our choice of soundtrack went well with the narrative. We also discussed the possibility of gathering sounds of the baby landing on the floor and general baby sounds.

Overall, I feel that the feedback we received was really useful and will help to make adjustments to our project that will benefit us. Although we have a few things to experiment with in terms of character design and environments, I feel that we are in a really strong position to move into the production stage.

Sunday, 25 October 2015

Telling Tales: Storyboard and Animatic Development

Now that we have our characters and environment sorted, I was able to sit down with Lauren and finalise our storyboard. Although they aren't anything major, we have made a few slight changes here and there to add comedy to our story and to include the second character a little more. We've also added in two new scenes to help clearly portray what our story is about from the very start. Taking on board what Sara went through the other week in her lecture, we went through to make sure that our narrative had all the elements that make a short story good.


We then sat down and finalised our timings so I could go away and create the animatic. I feel that the narrative works well and the story is clear and easy to follow. However, we can't quite decide on an ending, as I feel that it would be better to have a comedic ending, whereas Lauren wants to have a heart-ful ending, so we will have to ask in our interim crit which ending people will prefer.


Telling Tales: Final Character

In order to create my character in Maya, I need to create a reference to work from, so I decided to make the final design of my character in the 'T-pose' to use later when I start to model it in Maya. On top of this I also added colour to the design, so I knew what I'd be attempting to create when I came to texture my model.


Overall, I am really pleased with my character design, particularly because I'm not very confident when designing characters. It's not something that I enjoy doing very much, because I know very little about it. Having said this however, I feel that once I got into it, I managed to create a character that is relevant and appropriate for the narrative, so I am very pleased with my own progress and development (even though there is plenty of room for improvement). I'm confident that I'll be able to model this character in Maya and I'm eager to get started. 

Saturday, 24 October 2015

Telling Tales: Environment Development

Once we had figured out our characters I decided to do some rough sketches of environment designs to get us thinking more about the setting and props we'd be needing to help us tell our narrative. We had already decided from the beginning that our story would be taking place in a living room setting, so I focused on sketching out a few quick variations of a living room. 


However, after speaking to Mat, we decided to go with a Pocoyo-type environment, as it would be hard enough to create and animate our characters. Also this kind of environment would also help to draw attention to our characters and make the story easier to follow. With this in mind, I didn't take my environment concepts any further, as I felt that there was no need to.